The second-largest search engine after Google today is YouTube. Even though YouTube is one of the biggest search engines in the world today, very few people and businesses take advantage of it. I am happy to teach you how to create a YouTube channel step by step with no step skipped so that you can also take your business to the next level by using the power of YouTube.
Before I show you how to create a YouTube channel, let me tell you other great benefits of why you should start using it. A lot of people think it is too expensive to run a YouTube channel. But the truth is that YouTube is one of the cheapest social media platforms available today. It will cost you nothing to set up a YouTube channel. And I am going to show you the best free tools you can use to create beautiful thumbnails, profile images, and other artworks for your channel. I will also teach you free programs that can help you create videos to upload to your channel and how to promote your channel to reach a larger audience.
This is what you will learn:
How to create a YouTube channel
How to create YouTube channel arts
How to optimize your channels and videos
How to add your channel trailer
How to create a YouTube channel
You can create your YouTube channel with your already created Google account if you have, which is very simple. But note that if you will be creating your channel for your business or have the intention of others managing your YouTube channel in the future, then it will be good to create a new Google account with your business name to use for this purpose. Click here to create a Google account. You should see a page below and fill in the details.

How to create a YouTube channel using your Google account
Although you always watch YouTube videos with your Google account that does not mean YouTube is going to create a channel for you automatically. For you to create your channel, follow these steps.
How to Sign in to YouTube
There are two ways to sign in to YouTube.
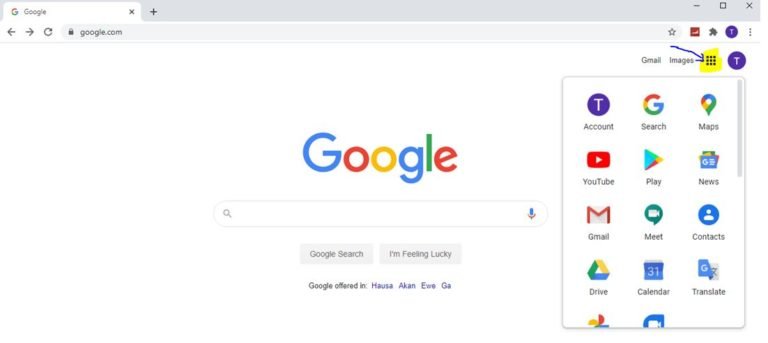
First of all, since you have already logged in to your account, just click on the 9 dots at the top right corner as highlighted above and click on it. Then you click on YouTube. This will automatically login with your account.
Alternatively, open YouTube.com and click ‘sign in’ in the top right corner of the page.
Then log in using the Google account you would like your channel to be associated with it.
Create your channel
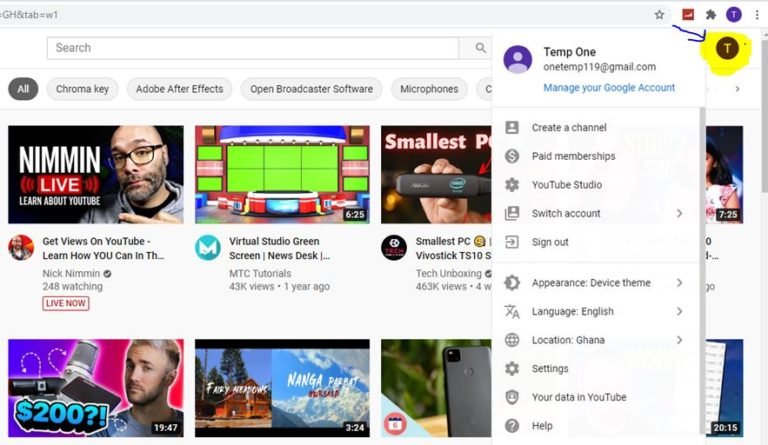
It is now time to create your YouTube channel. In the top right corner of the screen, click on your profile icon and then click “Create a channel.”
This is going to take you to a new page where you can successfully create your YouTube channel then you click Get Started to move to the next window.

Note Well: This is a very important stage. You now have the option to create a channel using the name and picture on your Google account or create a channel using a brand or other name and profile picture. So if you used your business name to create your Google account, then you can choose option 1. But if you used your personal Google account, then option 2 will be the best one for your case.
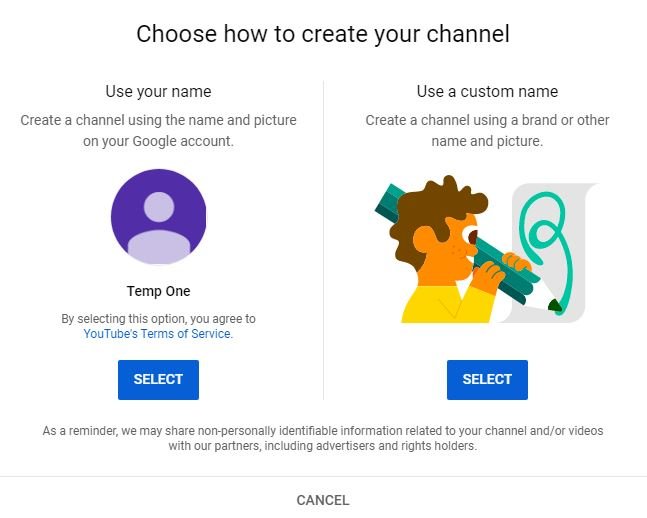
Creating a name for your YouTube channel is very important since that is how you are going to appear to the public. It is always important to include what you stand for or do in your name if possible. For example, if your channel is about health and you want to call your channel ULTIMATE, you can then call your channel “ULTIMATE HEALTH CHANNEL” This will help you so much when it comes to optimizing your channel for SEO which stands for search engine optimization.
You should also note that creating a new channel name will also create a new Google account with its own settings and YouTube history. This account rests within your main Google account and can be fully managed from the Google settings. It’s quite useful as you can use this new account to like and comment on other YouTube videos and participate in YouTube as your brand. So basically, your main Google account will be the parent and the new account will be the child but each has its own settings.
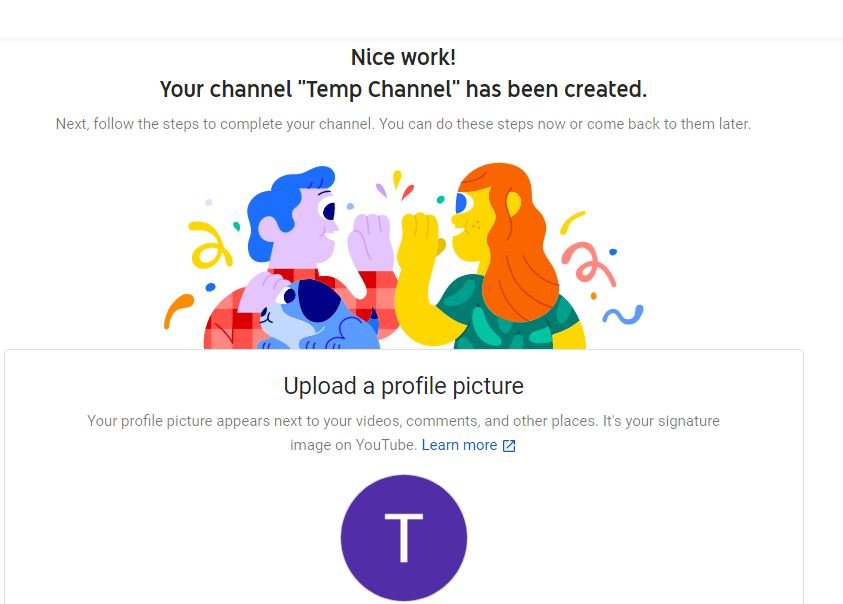
Choose your option and follow the steps till you complete the whole process. You will see a message as below.
How to Customize Your YouTube Channel
I have to congratulate you on working hard up to this point. Now you have successfully created your YouTube channel. You will see this message “Nice work! Your channel “Temp Channel” has been created”. Let me walk you through how to customize your YouTube channel.
Now you should be able to see the below options on your screen:
- Upload a profile picture
- Add a description of your channel
- Add links to your sites – this can include custom links to a website or blog as well as social links to Instagram or Twitter
We have two options here. We can add our profile picture, add our description of our channel, and also add our links. But there is a better way to do all of these and many more when we go inside our channel dashboard which I will prefer to show you all of these when we get there. So click on the option SET UP LATER to skip to the next stage.
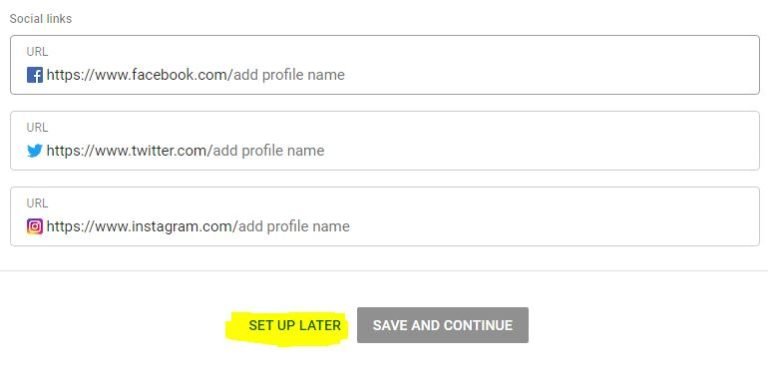
But before we start adding all these details, let me show you how you can create your channel arts then you can use them when we get to our YouTube channel dashboard or home.
How to Create A YouTube channel art
YouTube channel art is as important as your channel name. That is what people are going to see when they visit your channel. As it is always said, first impressions count, you have to pay much attention and invest your time and effort in creating a simple but good looking artwork.
But you may be asking, as a beginner how do I create a YouTube channel art and how much will that cost. Let me introduce you to a free software that most YouTubers use for all their artwork including us. The software is Canva. It is not just used to create artwork but rather could also be used to create Instagram and Facebook posts, flyers, banners, and a lot more.
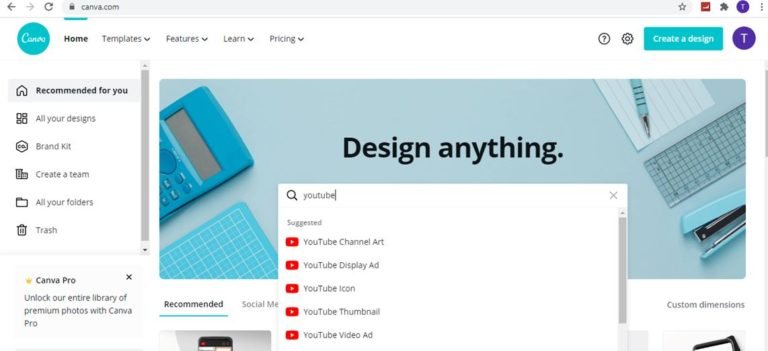
After clicking on Canva create an account either with Google or Facebook. Then you will be logged in to your dashboard. Just type in YouTube in the search and select YouTube channel art. You will see a variety of templates, just select one and edit it to suit your company name and colors. After that search YouTube again and select the YouTube icon and then select a template and create your profile image.
The perfect sizes for YouTube channel art
YouTube standard recommendation for channel artwork is 2560 x 1440 pixels. Your channel icon or profile picture should also be 800×800 pixels. But one thing is that when you use Canva templates as directed to create your artworks, you don’t need to worry about the sizes. Each template you choose already has the recommended size.
Customizing Your YouTube Channel
Now that you have created your YouTube channel art and profile picture with Canva, let us go ahead and customize our channel.
This is how your channel dashboard or homepage should look like.
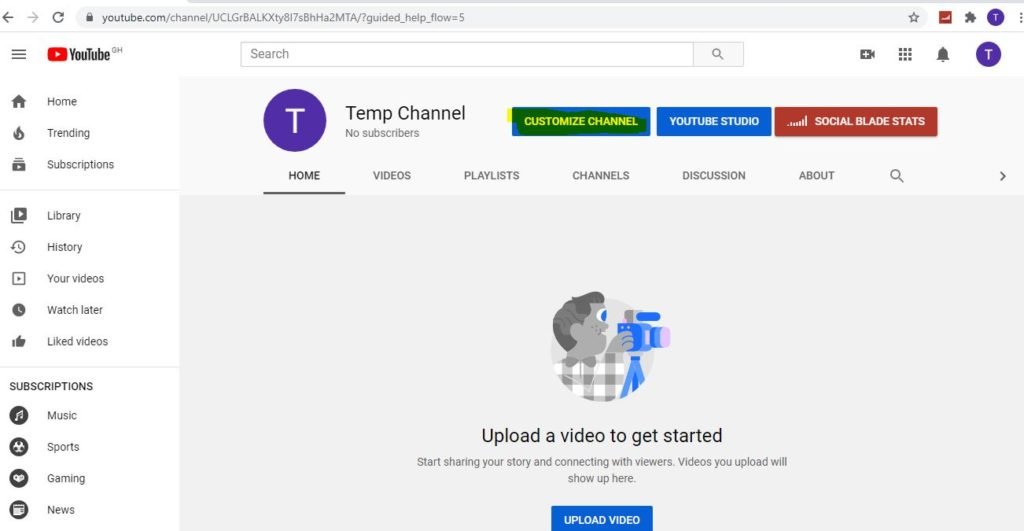
For you to customize your channel, all you have to do is to click on the customize channel at the top of the screen as shown above. after clicking on the customize button, you will see something like what is found below.
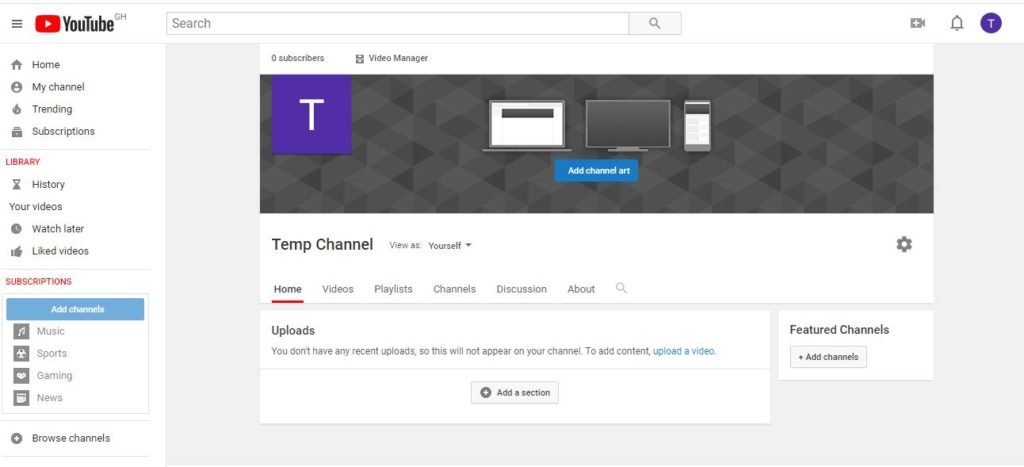
Now we are set to customize all the various areas of our channel. First of all, you can change the channel artwork and icon. Each channel has space for a profile icon/picture. This is the icon that shows next to your videos and channel on all YouTube pages. As explained earlier your channel icon should be 800 x 800 pixels and one of the following formats: JPG or PNG.
To change it just hover over your current channel icon until you see the edit icon appear. Click on that icon and you’ll be able to upload a new profile icon.
You will do the same thing to add channel art. Just hover your mouse to where the channel art is and you will see the pencil icon then click on it and select the artwork you have already created with Canva.
Once you upload your channel art, YouTube will show you a preview of how it looks on TV, desktop, and mobile. YouTube channel art preview for desktop, TV, and mobile
At this point, you may want to adjust the cropping of your image so that you can ensure it’s all lined up correctly. The cropping tool can be accessed by clicking on “Adjust the crop.”
This crop screen will help you in checking how your design will look on various platforms. The clear section in the middle of the grid shows you the content that will be displayed on mobile and desktop and the rest of the image shows the image that will be displayed on TVs.
But as mentioned earlier, if you created with Canva already made template, you don’t need to worry about cropping it because it will be the required dimensions that may not need any cropping. If you are happy with the way your cover art looks, click “Select” and your channel art will be added to your channel and be saved.
How to Create a YouTube Channel description
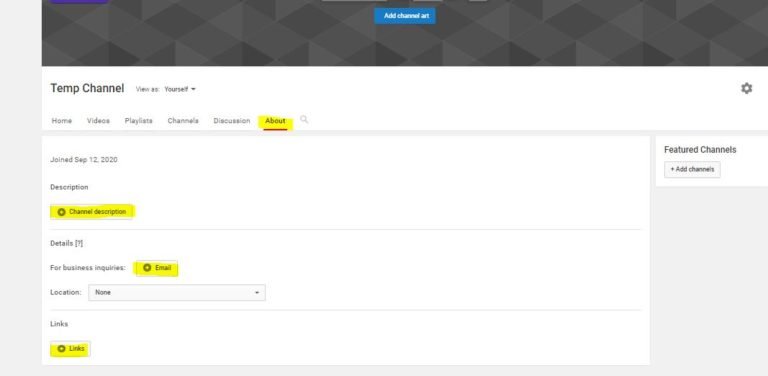
Now let’s talk about how to create a YouTube channel description. For you to access the description area, click on the About section. You will see description at the center. Click the little plus icon to add all the descriptions about your channel. Let people know all about you in your description. What you do or offer and any other relevant thing. Remember to click on done when you finish writing your description for it to save before you move on to a different item.
One thing you need to do at this point is also to include your business email. Click on the email in front of the “For business inquiries” area and enter the email address you would want to be contacted for business transactions. After that, add your location or country. Let’s get into another important aspect of your channel.
How To Create YouTube channel links
YouTube enables you to add links to your channel and these are displayed in the bottom right corner, overlaid on top of your channel art.
You can have up to five links appear in your channel’s banner. The first link will appear expanded as seen in the screenshot below.

For you to enter your links, just click on the links and also the little + icon then add your desired links.
How to customize YouTube subscribe link
Tip: You can customize a link for your audience to click and subscribe to your channel which is very handy. Let me show you how to customize the link. One way you can promote this link is by using Instagram or Facebook. It takes just a click for someone to subscribe to your channel which is better than the person going to your channel, search for the subscribe button before he subscribes.
To do this, copy the URL of your YouTube channel into a Microsoft Word document or any text document. This is an example of one of my channels (https://www.youtube.com/channel/UCMVHccC-qydvE-SdGFfctKw). Then add this code “?sub_confirmation=1” (don’t add the quotes). Do not separate this code from the channel link otherwise, it will not work. This is how it should be (https://www.youtube.com/channel/UCMVHccC-qydvE-SdGFfctKw?sub_confirmation=1)
If this link is too long and you want to shorten it, you can use this very handy software called bitly to shorten all types of long URLs to make it very attractive.
How to Optimize YouTube Channel Description
YouTube gives you a space on your channel to write a little about your brand and the content you share on their platform. The description is limited to 1,000 characters, so you have to do well to explain all you do and want others to know about your brand within these 1,000 characters.
One reason why you should take this part very seriously is that your channel description won’t just appear on your channel page. It will be indexed by search engines and can also be featured across YouTube in suggested channel categories and search results. Always remember to include some relevant keywords and CTAs (Call to action) within the opening lines of your description.
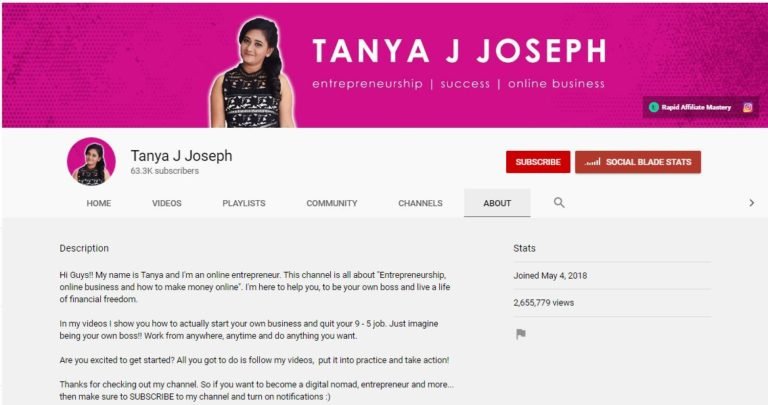
The reason why you should pay attention to your first 100-150 characters is that, depending on where the description appears, the remaining text could be cut off, and furthermore, that is what people are going to read first. So try and say all they need to know about you in the initial stage. Let me show you an example of one perfect description on YouTube from Tanya Joseph one of the best online entrepreneurs on YouTube.
How to Add a YouTube channel trailer
You may ask, what is a YouTube channel trailer? As soon as visitors land on your channel, you want to give them a picture of the type of content your channel covers and why they will want to subscribe and check out your videos. A channel trailer is a perfect way to do this.
A short and straight to the point channel trailer can be a great way to introduce people to your content. A channel trailer should grab attention as soon as it starts and also represents the type of content you create on YouTube. It’s also important to think about the description you add to this video as it features prominently on your channel homepage. Sometimes, people use one of their best videos which is also very good practice.
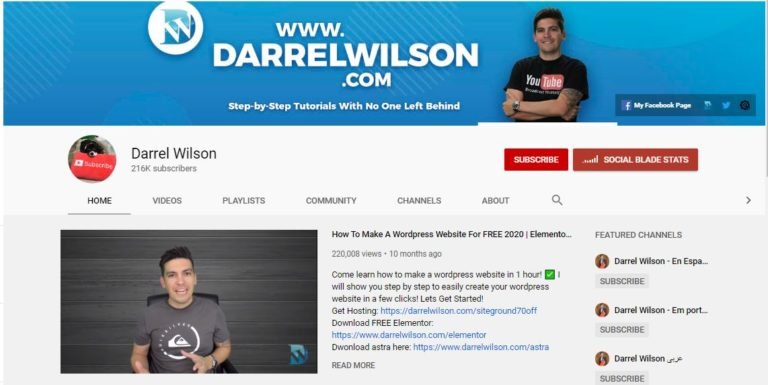
Note that these trailers only appear for people who are not yet subscribed to your channel and also people who are now visiting your channel. Check below to see an example of where a trailer from Darrel Wilson who is one of the best people in the website designing industry.
Conclusion
Thanks for reading and following closely up to this time. It’s my privilege walking you through how to create a YouTube channel step by step with no step skipped. I hope you learned some value out of this long journey and can confidently create your channel today.

One of the best ways to make a passive income online is creating your own website or blog. Would you need assistance in creating one for yourself? Never worry, you can find a step by step guide on how to create a website in this article The Best Steps To Start a New Blog and Grow Faster.
There are also freelancing websites that you can also find well-paying freelancing jobs. In addition to that, we have some best websites that you can take surveys and get paid. If you would want to know more about these work from home jobs, then read this article, Best Work from Home Jobs for Beginners.
Share the fun by sharing this with your friends and family who may also need it to create their YouTube channel. I would love to hear from you and learn from your experience in the comments section below. You can always contact us if you need personal assistance from Rapid Entrepreneurs. You can send us a message on info@rapidentrepreneurs.com. Hope to hear from you soon.
